General Semantic Segmentation Pipeline Tutorial
1. Introduction to the General Semantic Segmentation Pipeline
Semantic segmentation is a computer vision technique that aims to assign each pixel in an image to a specific category, enabling a detailed understanding of the image content. Semantic segmentation not only identifies the types of objects in an image but also classifies each pixel, allowing regions of the same category to be fully labeled. For example, in a street scene image, semantic segmentation can distinguish pedestrians, cars, the sky, and roads pixel by pixel, forming a detailed label map. This technology is widely used in autonomous driving, medical image analysis, and human-computer interaction, often relying on deep learning models (such as SegFormer, etc.) to extract features by CNN or Transformer, and achieve high-precision pixel-level classification, providing a foundation for further intelligent analysis.
The inference time only includes the model inference time and does not include the time for pre- or post-processing.
| Model Name | Model Download Link | mIoU (%) | GPU Inference Time (ms) [Normal Mode / High-Performance Mode] |
CPU Inference Time (ms) [Normal Mode / High-Performance Mode] |
Model Storage Size (MB) |
|---|---|---|---|---|---|
| OCRNet_HRNet-W48 | Inference Model/Training Model | 82.15 | 582.92 / 536.28 | 3513.72 / 2543.10 | 270 |
| PP-LiteSeg-T | Inference Model/Training Model | 73.10 | 28.12 / 23.84 | 398.31 / 398.31 | 28.5 |
❗ The above list features the 2 core models that the image classification module primarily supports. In total, this module supports 18 models. The complete list of models is as follows:
👉Model List Details
| Model Name | Model Download Link | mIoU (%) | GPU Inference Time (ms) [Normal Mode / High-Performance Mode] |
CPU Inference Time (ms) [Normal Mode / High-Performance Mode] |
Model Storage Size (MB) |
|---|---|---|---|---|---|
| Deeplabv3_Plus-R50 | Inference Model/Training Model | 80.36 | 481.33 / 446.18 | 2952.95 / 1907.07 | 94.9 |
| Deeplabv3_Plus-R101 | Inference Model/Training Model | 81.10 | 766.70 / 194.42 | 4441.56 / 2984.19 | 162.5 |
| Deeplabv3-R50 | Inference Model/Training Model | 79.90 | 681.65 / 602.10 | 3786.41 / 3093.10 | 138.3 |
| Deeplabv3-R101 | Inference Model/Training Model | 80.85 | 974.62 / 896.99 | 5222.60 / 4230.79 | 205.9 |
| OCRNet_HRNet-W18 | Inference Model/Training Model | 80.67 | 271.02 / 221.38 | 1791.52 / 1061.62 | 43.1 |
| OCRNet_HRNet-W48 | Inference Model/Training Model | 82.15 | 582.92 / 536.28 | 3513.72 / 2543.10 | 270 |
| PP-LiteSeg-T | Inference Model/Training Model | 73.10 | 28.12 / 23.84 | 398.31 / 398.31 | 28.5 |
| PP-LiteSeg-B | Inference Model/Training Model | 75.25 | 35.69 / 35.69 | 485.10 / 485.10 | 47.0 |
| SegFormer-B0 (slice) | Inference Model/Training Model | 76.73 | 11.1946 | 268.929 | 13.2 |
| SegFormer-B1 (slice) | Inference Model/Training Model | 78.35 | 17.9998 | 403.393 | 48.5 |
| SegFormer-B2 (slice) | Inference Model/Training Model | 81.60 | 48.0371 | 1248.52 | 96.9 |
| SegFormer-B3 (slice) | Inference Model/Training Model | 82.47 | 64.341 | 1666.35 | 167.3 |
| SegFormer-B4 (slice) | Inference Model/Training Model | 82.38 | 82.4336 | 1995.42 | 226.7 |
| SegFormer-B5 (slice) | Inference Model/Training Model | 82.58 | 97.3717 | 2420.19 | 229.7 |
The accuracy metrics of the above models are measured on the Cityscapes dataset. GPU inference time is based on an NVIDIA Tesla T4 machine with FP32 precision. CPU inference speed is based on an Intel(R) Xeon(R) Gold 5117 CPU @ 2.00GHz with 8 threads and FP32 precision.
| Model Name | Model Download Link | mIoU (%) | GPU Inference Time (ms) [Normal Mode / High-Performance Mode] |
CPU Inference Time (ms) [Normal Mode / High-Performance Mode] |
Model Storage Size (MB) |
|---|---|---|---|---|---|
| SeaFormer_base(slice) | Inference Model/Training Model | 40.92 | 24.4073 | 397.574 | 30.8 |
| SeaFormer_large (slice) | Inference Model/Training Model | 43.66 | 27.8123 | 550.464 | 49.8 |
| SeaFormer_small (slice) | Inference Model/Training Model | 38.73 | 19.2295 | 358.343 | 14.3 |
| SeaFormer_tiny (slice) | Inference Model/Training Model | 34.58 | 13.9496 | 330.132 | 6.1 |
- Performance Test Environment
- Test Dataset: ADE20k dataset and Cityscapes dataset.
- Hardware Configuration:
- GPU: NVIDIA Tesla T4
- CPU: Intel Xeon Gold 6271C @ 2.60GHz
- Software Environment:
- Ubuntu 20.04 / CUDA 11.8 / cuDNN 8.9 / TensorRT 8.6.1.6
- paddlepaddle 3.0.0 / paddlex 3.0.3
| Mode | GPU Configuration | CPU Configuration | Acceleration Technology Combination |
|---|---|---|---|
| Normal Mode | FP32 Precision / No TRT Acceleration | FP32 Precision / 8 Threads | PaddleInference |
| High-Performance Mode | Optimal combination of pre-selected precision types and acceleration strategies | FP32 Precision / 8 Threads | Pre-selected optimal backend (Paddle/OpenVINO/TRT, etc.) |
2. Quick Start
PaddleX's pre-trained model pipelines can be quickly experienced. You can experience the effects of the General Semantic Segmentation Pipeline online or locally using command line or Python.
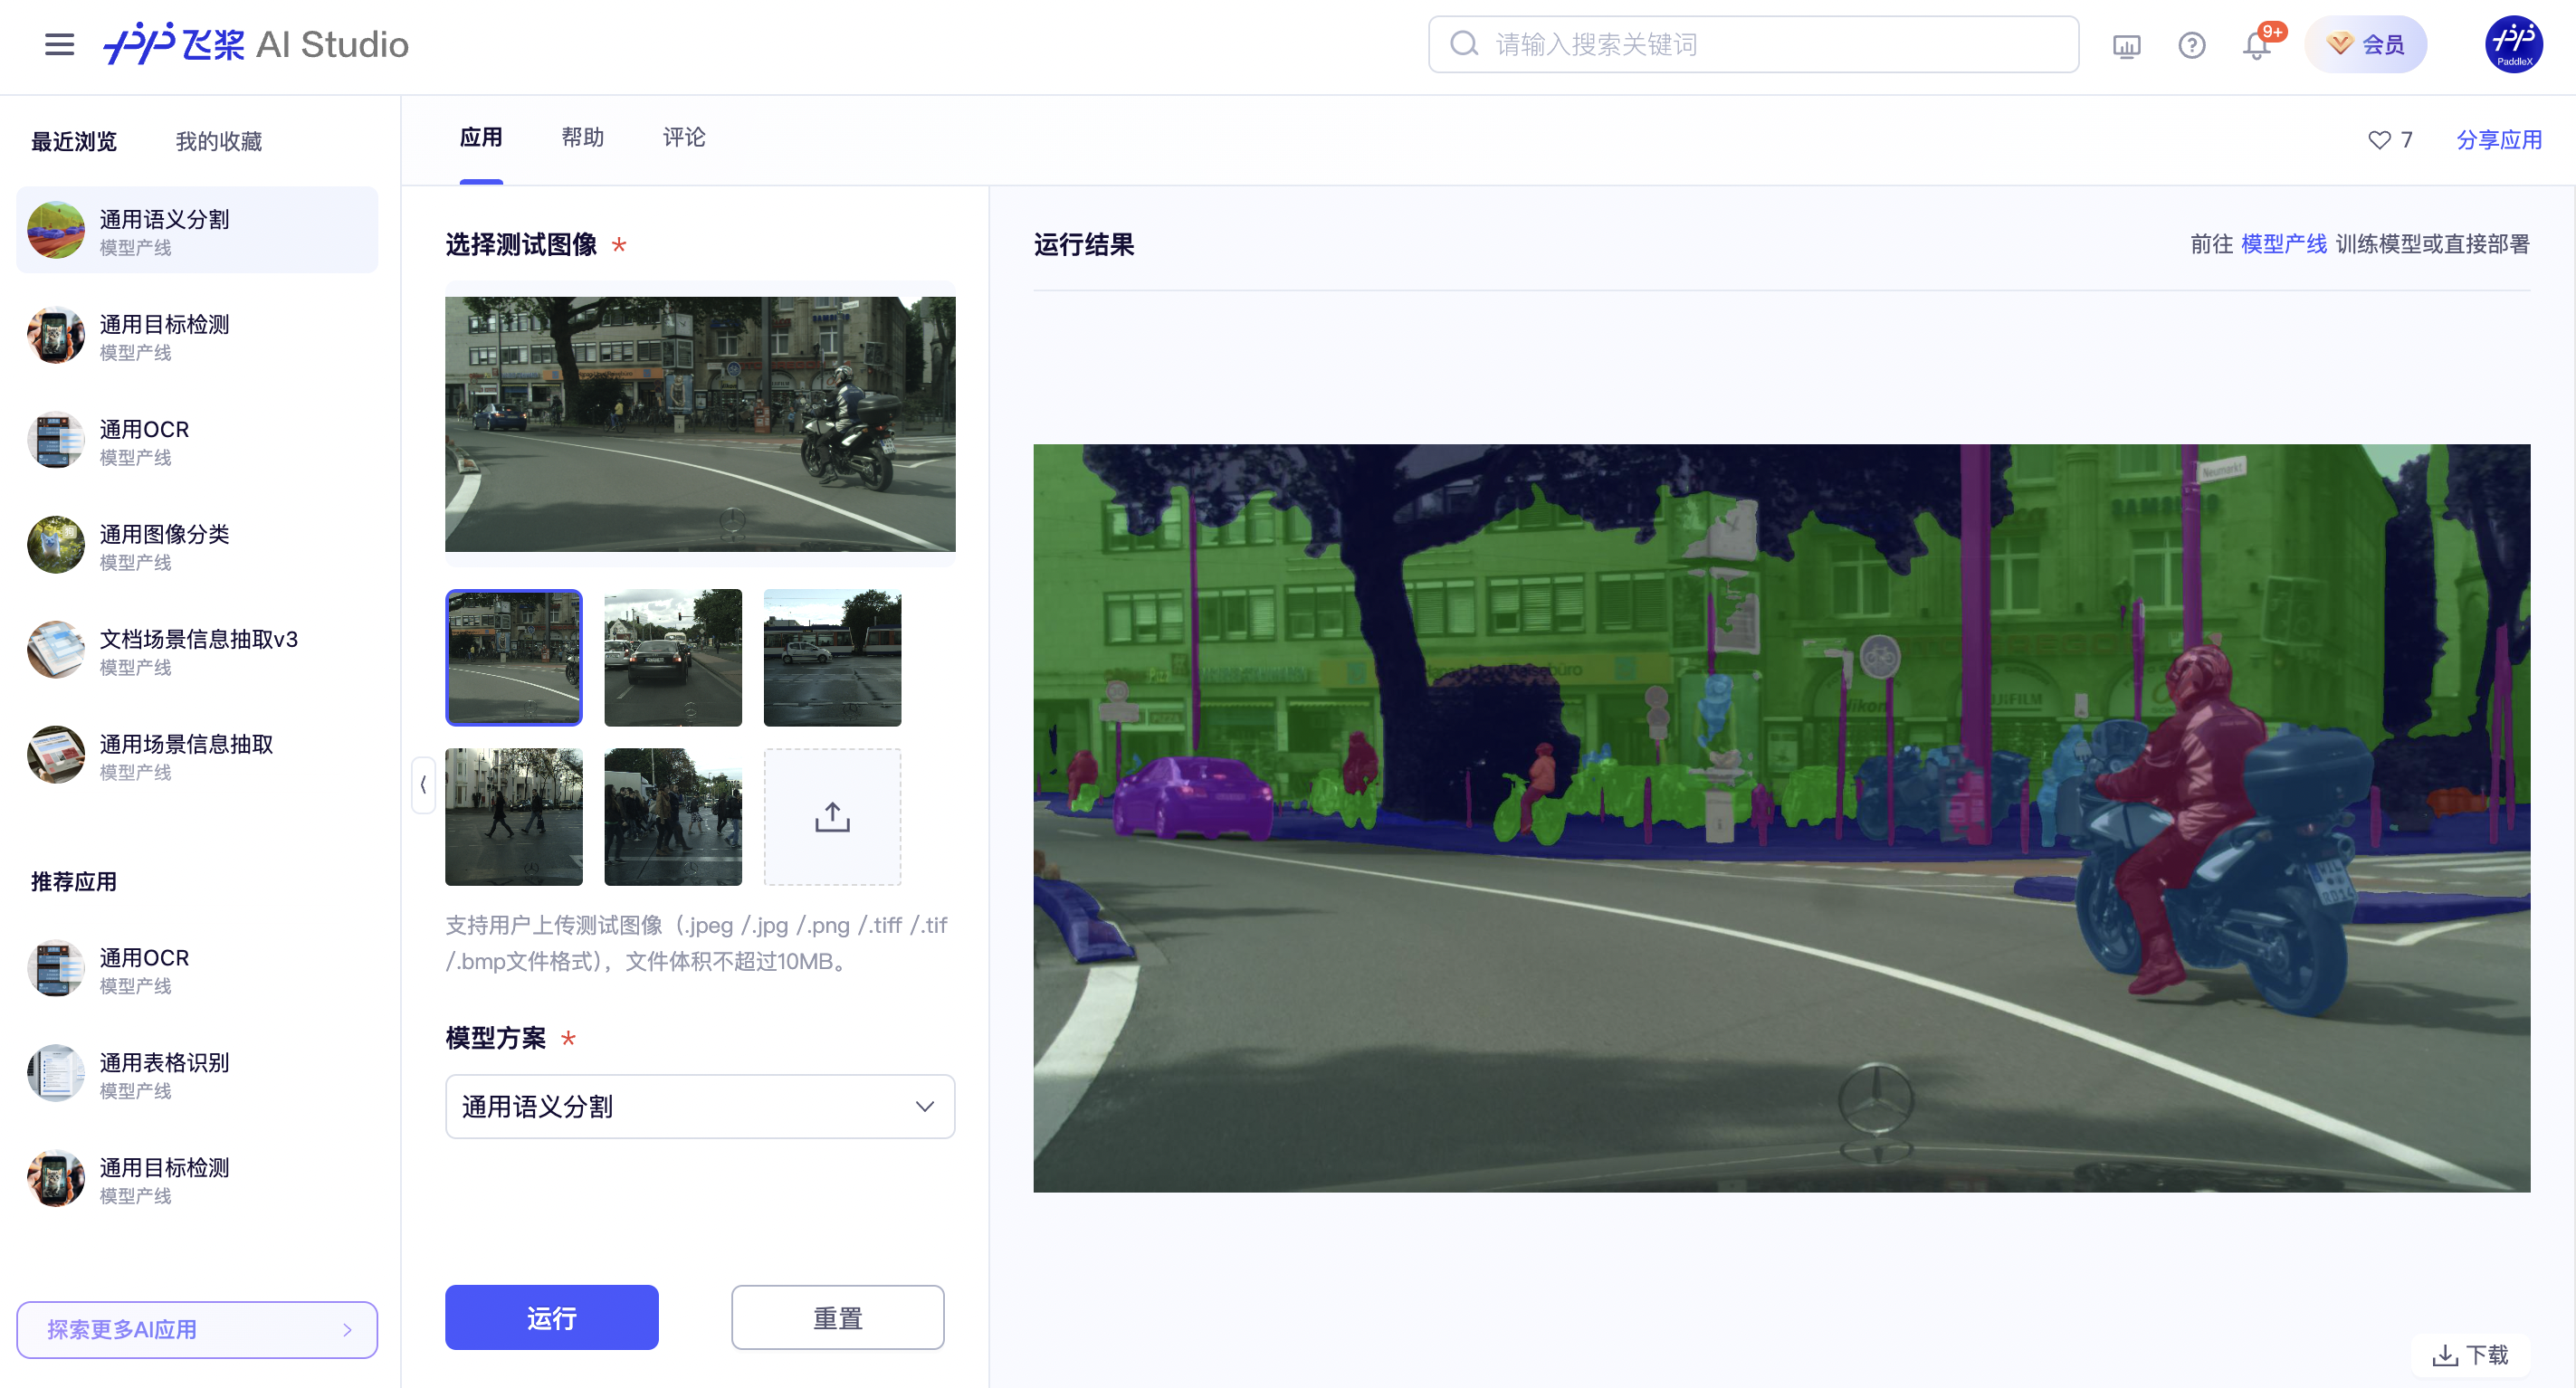
2.1 Online Experience
You can experience online the effects of the General Semantic Segmentation Pipeline, using the official demo images for recognition, for example:
If you are satisfied with the pipeline's performance, you can directly integrate and deploy it. If not, you can also use your private data to fine-tune the model in the pipeline online.
2.2 Local Experience
❗ Before using the general semantic segmentation pipeline locally, please ensure that you have completed the installation of the PaddleX wheel package according to the PaddleX Local Installation Guide. If you wish to selectively install dependencies, please refer to the relevant instructions in the installation guide. The dependency group corresponding to this pipeline is
cv.
2.2.1 Command Line Experience
- You can quickly experience the semantic segmentation pipeline effect with a single command. Use the test file, and replace
--inputwith the local path for prediction.
paddlex --pipeline semantic_segmentation \
        --input makassaridn-road_demo.png \
        --target_size -1 \
        --save_path ./output \
        --device gpu:0 \
The relevant parameter descriptions can be referred to in the parameter explanations in 2.2.2 Python Script Integration. Supports specifying multiple devices simultaneously for parallel inference. For details, please refer to the documentation on pipeline parallel inference.
After running, the result will be printed to the terminal, as follows:
The explanation of the output result parameters can be found in the 2.2.2 Integration with Python Script section.
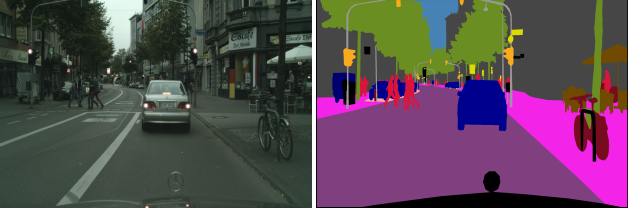
The visualization results are saved under save_path, and the visualization result of semantic segmentation is as follows:

2.2.2 Integration with Python Script
- The above command line is for quickly experiencing and viewing the effect. Generally, in a project, it is often necessary to integrate through code. You can complete the fast inference of the pipeline with just a few lines of code. The inference code is as follows:
from paddlex import create_pipeline
pipeline = create_pipeline(pipeline="semantic_segmentation")
output = pipeline.predict(input="makassaridn-road_demo.png", target_size = -1)
for res in output:
    res.print()
    res.save_to_img(save_path="./output/")
    res.save_to_json(save_path="./output/")
In the above Python script, the following steps are executed:
(1) The semantic segmentation pipeline object is instantiated via create_pipeline(), with the following parameter descriptions:
| Parameter | Description | Type | Default | |
|---|---|---|---|---|
pipeline |
Pipeline name or path to pipeline config file, if it's set as a pipeline name, it must be a pipeline supported by PaddleX. | str |
None |
|
config |
Specific configuration information for the pipeline (if set simultaneously with the pipeline, it takes precedence over the pipeline, and the pipeline name must match the pipeline).
|
dict[str, Any] |
None |
|
device |
Pipeline inference device. Supports specifying the specific GPU card number, such as "gpu:0", other hardware specific card numbers, such as "npu:0", CPU such as "cpu". Supports specifying multiple devices simultaneously for parallel inference. For details, please refer to Pipeline Parallel Inference. | str |
None |
|
use_hpip |
Whether to enable the high-performance inference plugin. If set to None, the setting from the configuration file or config will be used. |
bool |
None | None |
hpi_config |
High-performance inference configuration | dict | None |
None | None |
(2) Call the predict() method of the semantic segmentation pipeline object for inference prediction. This method will return a generator. Below are the parameters of the predict() method and their descriptions:
| Parameter | Description | Type | Options | Default Value |
|---|---|---|---|---|
input |
Data to be predicted, supports multiple input types, required | Python Var|str|list |
|
None |
target_size |
Image resolution actually used during model inference | int|-1|None|tuple[int,int] |
|
None |
(3) Process the prediction results. Each prediction result is of dict type and supports operations such as printing, saving as an image, and saving as a json file:
| Method | Description | Parameter | Type | Explanation | Default Value |
|---|---|---|---|---|---|
print() |
Print the result to the terminal | format_json |
bool |
Whether to format the output content using JSON indentation |
True |
indent |
int |
Specify the indentation level to beautify the JSON data for better readability. This is only effective when format_json is True |
4 | ||
ensure_ascii |
bool |
Control whether non-ASCII characters are escaped to Unicode. If set to True, all non-ASCII characters will be escaped; False retains the original characters. This is only effective when format_json is True |
False |
||
save_to_json() |
Save the result as a JSON file | save_path |
str |
The file path for saving. If it is a directory, the saved file will have the same name as the input file type | None |
indent |
int |
Specify the indentation level to beautify the JSON data for better readability. This is only effective when format_json is True |
4 | ||
ensure_ascii |
bool |
Control whether non-ASCII characters are escaped to Unicode. If set to True, all non-ASCII characters will be escaped; False retains the original characters. This is only effective when format_json is True |
False |
||
save_to_img() |
Save the result as an image file | save_path |
str |
The file path for saving, supporting both directory and file paths | None |
-
Calling the
print()method will print the result to the terminal, with the printed content explained as follows:-
input_path:(str)The input path of the image to be predicted -
page_index:(Union[int, None])If the input is a PDF file, this indicates the current page number of the PDF; otherwise, it isNone -
pred:...The actual mask predicted by the semantic segmentation model. Since the data is too large to print directly, it is replaced with.... The prediction result can be saved as an image usingres.save_to_imgand as a JSON file usingres.save_to_json.
-
-
Calling the
save_to_json()method will save the above content to the specifiedsave_path. If a directory is specified, the saved path will besave_path/{your_img_basename}_res.json. If a file is specified, it will be saved directly to that file. Since JSON files do not support saving NumPy arrays, thenumpy.arraytype will be converted to a list format. -
Calling the
save_to_img()method will save the visualization result to the specifiedsave_path. If a directory is specified, the saved path will besave_path/{your_img_basename}_res.{your_img_extension}. If a file is specified, it will be saved directly to that file. -
Additionally, it also supports obtaining the visualization image with results and prediction results through attributes, as follows:
| Attribute | Attribute Description |
|---|---|
json |
Get the prediction results in json format |
img |
Get the visualization image in dict format |
- The prediction results obtained through the
jsonattribute are of dict type, and the content is consistent with what is saved by calling thesave_to_json()method. - The prediction results returned by the
imgattribute are of dict type. The key isres, and the corresponding value is anImage.Imageobject: an object used to display the prediction results of semantic segmentation.
Additionally, you can obtain the configuration file for the semantic segmentation pipeline and load the configuration file for prediction. You can execute the following command to save the results in my_path:
If you have obtained the configuration file, you can customize the various configurations of the semantic segmentation pipeline. You only need to modify the pipeline parameter value in the create_pipeline method to the path of the pipeline configuration file. An example is as follows:
from paddlex import create_pipeline

pipeline = create_pipeline(pipeline="./my_path/semantic_segmentation.yaml")

output = pipeline.predict(
    input="./makassaridn-road_demo.png",
    target_size=-1,
)
for res in output:
    res.print()
    res.save_to_img("./output/")
    res.save_to_json("./output/")
Note: The parameters in the configuration file are the pipeline initialization parameters. If you wish to change the initialization parameters of the general semantic segmentation pipeline, you can directly modify the parameters in the configuration file and load the configuration file for prediction. Additionally, CLI prediction also supports passing in a configuration file, simply specify the path of the configuration file with --pipeline.
3. Development Integration/Deployment
If the pipeline meets your requirements for inference speed and accuracy, you can proceed directly with development integration/deployment.
If you need to integrate the pipeline into your Python project, you can refer to the example code in 2.2.2 Python Script Method.
Moreover, PaddleX also provides three other deployment methods, as detailed below:
🚀 High-Performance Inference: In practical production environments, many applications have stringent performance requirements for deployment strategies, especially in terms of response speed, to ensure efficient system operation and smooth user experience. To this end, PaddleX offers a high-performance inference plugin that deeply optimizes model inference and pre/post-processing to significantly speed up the end-to-end process. For detailed information on high-performance inference, please refer to the PaddleX High-Performance Inference Guide.
☁️ Service Deployment: Service deployment is a common form of deployment in practical production environments. By encapsulating inference functionality into services, clients can access these services via network requests to obtain inference results. PaddleX supports various pipeline service deployment solutions. For detailed information on pipeline service deployment, please refer to the PaddleX Service Deployment Guide.
Below are the API references for basic service deployment and examples of multi-language service calls:
API Reference
For the main operations provided by the service:
- The HTTP request method is POST.
- Both the request body and response body are JSON data (JSON objects).
- When the request is successfully processed, the response status code is
200, and the attributes of the response body are as follows:
| Name | Type | Meaning |
|---|---|---|
logId |
string |
The UUID of the request. |
errorCode |
integer |
Error code. Fixed at 0. |
errorMsg |
string |
Error description. Fixed at "Success". |
result |
object |
Operation result. |
- When the request is not successfully processed, the attributes of the response body are as follows:
| Name | Type | Meaning |
|---|---|---|
logId |
string |
The UUID of the request. |
errorCode |
integer |
Error code. Same as the response status code. |
errorMsg |
string |
Error description. |
The main operations provided by the service are as follows:
infer
Perform semantic segmentation on an image.
POST /semantic-segmentation
- The attributes of the request body are as follows:
| Name | Type | Meaning | Required |
|---|---|---|---|
image |
string |
The URL of the image file accessible by the server or the Base64 encoded content of the image file. | Yes |
targetSize |
integer | array | null |
Please refer to the description of the target_size parameter of the pipeline object's predict method. |
No |
visualize |
boolean | null |
Whether to return the final visualization image and intermediate images during the processing.
For example, adding the following setting to the pipeline config file: visualize parameter in the request.If neither the request body nor the configuration file is set (If visualize is set to null in the request and not defined in the configuration file), the image is returned by default.
|
No |
- When the request is successfully processed, the
resultof the response body has the following attributes:
| Name | Type | Meaning |
|---|---|---|
labelMap |
array |
Records the class label of each pixel in the image (arranged in row-major order). |
size |
array |
Image shape. The elements in the array are the height and width of the image, respectively. |
image |
string| null |
Semantic segmentation result image. The image is in JPEG format and encoded using Base64. |
An example of result is as follows:
{
"labelMap": [
0,
0,
1,
2
],
"size": [
2,
2
],
"image": "xxxxxx"
}
Multi-language Service Call Example
Python
import base64
import requests

API_URL = "http://localhost:8080/semantic-segmentation" # Service URL
image_path = "./demo.jpg"
output_image_path = "./out.jpg"

# Base64 encode the local image
with open(image_path, "rb") as file:
    image_bytes = file.read()
    image_data = base64.b64encode(image_bytes).decode("ascii")

payload = {"image": image_data}  # Base64 encoded file content or image URL

# Call the API
response = requests.post(API_URL, json=payload)

# Handle the API response
assert response.status_code == 200
result = response.json()["result"]
with open(output_image_path, "wb") as file:
    file.write(base64.b64decode(result["image"]))
print(f"Output image saved at {output_image_path}")
# result.labelMap records the category label of each pixel in the image (in row-major order) see API reference documentation for details
C++
#include <iostream>
#include "cpp-httplib/httplib.h" // https://github.com/Huiyicc/cpp-httplib
#include "nlohmann/json.hpp" // https://github.com/nlohmann/json
#include "base64.hpp" // https://github.com/tobiaslocker/base64

int main() {
    httplib::Client client("localhost:8080");
    const std::string imagePath = "./demo.jpg";
    const std::string outputImagePath = "./out.jpg";

    httplib::Headers headers = {
        {"Content-Type", "application/json"}
    };

    // Base64 encode the local image
    std::ifstream file(imagePath, std::ios::binary | std::ios::ate);
    std::streamsize size = file.tellg();
    file.seekg(0, std::ios::beg);

    std::vector<char> buffer(size);
    if (!file.read(buffer.data(), size)) {
        std::cerr << "Error reading file." << std::endl;
        return 1;
    }
    std::string bufferStr(reinterpret_cast<const char*>(buffer.data()), buffer.size());
    std::string encodedImage = base64::to_base64(bufferStr);

    nlohmann::json jsonObj;
    jsonObj["image"] = encodedImage;
    std::string body = jsonObj.dump();

    // Call the API
    auto response = client.Post("/semantic-segmentation", headers, body, "application/json");
    // Handle the API response
    if (response && response->status == 200) {
        nlohmann::json jsonResponse = nlohmann::json::parse(response->body);
        auto result = jsonResponse["result"];

        encodedImage = result["image"];
        std::string decodedString = base64::from_base64(encodedImage);
        std::vector<unsigned char> decodedImage(decodedString.begin(), decodedString.end());
        std::ofstream outputImage(outPutImagePath, std::ios::binary | std::ios::out);
        if (outputImage.is_open()) {
            outputImage.write(reinterpret_cast<char*>(decodedImage.data()), decodedImage.size());
            outputImage.close();
            std::cout << "Output image saved at " << outPutImagePath << std::endl;
            // result.labelMap records the category label of each pixel in the image (in row-major order) see API reference documentation for details
        } else {
            std::cerr << "Unable to open file for writing: " << outPutImagePath << std::endl;
        }
    } else {
        std::cout << "Failed to send HTTP request." << std::endl;
        return 1;
    }

    return 0;
}
Java
import okhttp3.*;
import com.fasterxml.jackson.databind.ObjectMapper;
import com.fasterxml.jackson.databind.JsonNode;
import com.fasterxml.jackson.databind.node.ObjectNode;

import java.io.File;
import java.io.FileOutputStream;
import java.io.IOException;
import java.util.Base64;

public class Main {
    public static void main(String[] args) throws IOException {
        String API_URL = "http://localhost:8080/semantic-segmentation"; // Service URL
        String imagePath = "./demo.jpg"; // Local image
        String outputImagePath = "./out.jpg"; // Output image

        // Encode the local image using Base64
        File file = new File(imagePath);
        byte[] fileContent = java.nio.file.Files.readAllBytes(file.toPath());
        String imageData = Base64.getEncoder().encodeToString(fileContent);

        ObjectMapper objectMapper = new ObjectMapper();
        ObjectNode params = objectMapper.createObjectNode();
        params.put("image", imageData); // Base64 encoded file content or image URL

        // Create an OkHttpClient instance
        OkHttpClient client = new OkHttpClient();
        MediaType JSON = MediaType.Companion.get("application/json; charset=utf-8");
        RequestBody body = RequestBody.Companion.create(params.toString(), JSON);
        Request request = new Request.Builder()
                .url(API_URL)
                .post(body)
                .build();

        // Call the API and process the response data
        try (Response response = client.newCall(request).execute()) {
            if (response.isSuccessful()) {
                String responseBody = response.body().string();
                JsonNode resultNode = objectMapper.readTree(responseBody);
                JsonNode result = resultNode.get("result");
                String base64Image = result.get("image").asText();
                JsonNode labelMap = result.get("labelMap");

                byte[] imageBytes = Base64.getDecoder().decode(base64Image);
                try (FileOutputStream fos = new FileOutputStream(outputImagePath)) {
                    fos.write(imageBytes);
                }
                System.out.println("Output image saved at " + outputImagePath);
                // result.labelMap records the class labels of each pixel in the image (arranged in row-major order), see the API reference documentation for details
            } else {
                System.err.println("Request failed with code: " + response.code());
            }
        }
    }
}
Go
package main

import (
    "bytes"
    "encoding/base64"
    "encoding/json"
    "fmt"
    "io/ioutil"
    "net/http"
)

func main() {
    API_URL := "http://localhost:8080/semantic-segmentation"
    imagePath := "./demo.jpg"
    outputImagePath := "./out.jpg"

    // Encode the local image to Base64
    imageBytes, err := ioutil.ReadFile(imagePath)
    if err != nil {
        fmt.Println("Error reading image file:", err)
        return
    }
    imageData := base64.StdEncoding.EncodeToString(imageBytes)

    payload := map[string]string{"image": imageData} // Base64-encoded file content or image URL
    payloadBytes, err := json.Marshal(payload)
    if err != nil {
        fmt.Println("Error marshaling payload:", err)
        return
    }

    // Call the API
    client := &http.Client{}
    req, err := http.NewRequest("POST", API_URL, bytes.NewBuffer(payloadBytes))
    if err != nil {
        fmt.Println("Error creating request:", err)
        return
    }

    res, err := client.Do(req)
    if err != nil {
        fmt.Println("Error sending request:", err)
        return
    }
    defer res.Body.Close()

    // Process the response data
    body, err := ioutil.ReadAll(res.Body)
    if err != nil {
        fmt.Println("Error reading response body:", err)
        return
    }
    type Response struct {
        Result struct {
            Image      string   `json:"image"`
            Labelmap []map[string]interface{} `json:"labelMap"`
        } `json:"result"`
    }
    var respData Response
    err = json.Unmarshal([]byte(string(body)), &respData)
    if err != nil {
        fmt.Println("Error unmarshaling response body:", err)
        return
    }

    outputImageData, err := base64.StdEncoding.DecodeString(respData.Result.Image)
    if err != nil {
        fmt.Println("Error decoding base64 image data:", err)
        return
    }
    err = ioutil.WriteFile(outputImagePath, outputImageData, 0644)
    if err != nil {
        fmt.Println("Error writing image to file:", err)
        return
    }
    fmt.Printf("Image saved at %s.jpg\n", outputImagePath)
    // result.labelMap records the class labels of each pixel in the image (arranged in row-major order). See the API reference for details.
}
C#
using System;
using System.IO;
using System.Net.Http;
using System.Net.Http.Headers;
using System.Text;
using System.Threading.Tasks;
using Newtonsoft.Json.Linq;

class Program
{
    static readonly string API_URL = "http://localhost:8080/semantic-segmentation";
    static readonly string imagePath = "./demo.jpg";
    static readonly string outputImagePath = "./out.jpg";

    static async Task Main(string[] args)
    {
        var httpClient = new HttpClient();

        // Encode the local image in Base64
        byte[] imageBytes = File.ReadAllBytes(imagePath);
        string image_data = Convert.ToBase64String(imageBytes);

        var payload = new JObject{ { "image", image_data } }; // Base64 encoded file content or image URL
        var content = new StringContent(payload.ToString(), Encoding.UTF8, "application/json");

        // Call the API
        HttpResponseMessage response = await httpClient.PostAsync(API_URL, content);
        response.EnsureSuccessStatusCode();

        // Process the returned data
        string responseBody = await response.Content.ReadAsStringAsync();
        JObject jsonResponse = JObject.Parse(responseBody);

        string base64Image = jsonResponse["result"]["image"].ToString();
        byte[] outputImageBytes = Convert.FromBase64String(base64Image);

        File.WriteAllBytes(outputImagePath, outputImageBytes);
        Console.WriteLine($"Output image saved at {outputImagePath}");
        // result.labelMap records the class label of each pixel in the image (arranged in row-major order). See the API reference documentation for details.
    }
}
Node.js
const axios = require('axios');
const fs = require('fs');

const API_URL = 'http://localhost:8080/semantic-segmentation'
const imagePath = './demo.jpg'
const outputImagePath = "./out.jpg";

let config = {
   method: 'POST',
   maxBodyLength: Infinity,
   url: API_URL,
   data: JSON.stringify({
    'image': encodeImageToBase64(imagePath)  // Base64 encoded file content or image URL
  })
};

// Base64 encode the local image
function encodeImageToBase64(filePath) {
  const bitmap = fs.readFileSync(filePath);
  return Buffer.from(bitmap).toString('base64');
}

// Call the API
axios.request(config)
.then((response) => {
    // Handle the API response
    const result = response.data["result"];
    const imageBuffer = Buffer.from(result["image"], 'base64');
    fs.writeFile(outputImagePath, imageBuffer, (err) => {
      if (err) throw err;
      console.log(`Output image saved at ${outputImagePath}`);
    });
    // result.labelMap records the category label of each pixel in the image (in row-major order) see API reference documentation for details
})
.catch((error) => {
  console.log(error);
});
PHP
<?php

$API_URL = "http://localhost:8080/semantic-segmentation"; // Service URL
$image_path = "./demo.jpg";
$output_image_path = "./out.jpg";

// Encode the local image using Base64
$image_data = base64_encode(file_get_contents($image_path));
$payload = array("image" => $image_data); // Base64 encoded file content or image URL

// Call the API
$ch = curl_init($API_URL);
curl_setopt($ch, CURLOPT_POST, true);
curl_setopt($ch, CURLOPT_POSTFIELDS, json_encode($payload));
curl_setopt($ch, CURLOPT_HTTPHEADER, array('Content-Type: application/json'));
curl_setopt($ch, CURLOPT_RETURNTRANSFER, true);
$response = curl_exec($ch);
curl_close($ch);

// Process the response data
$result = json_decode($response, true)["result"];
file_put_contents($output_image_path, base64_decode($result["image"]));
echo "Output image saved at " . $output_image_path . "\n";
// result.labelMap records the class labels of each pixel in the image (arranged in row-major order), see the API reference documentation for details
?>
📱 On-Device Deployment: Edge deployment is a method of placing computing and data processing capabilities directly on user devices, allowing them to process data locally without relying on remote servers. PaddleX supports deploying models on edge devices such as Android. For detailed instructions on edge deployment, please refer to the PaddleX On-Device Deployment Guide. You can choose the appropriate method to deploy your model based on your needs and proceed with the integration of AI applications.
4. Custom Development
If the default model weights provided by the general semantic segmentation pipeline do not meet your requirements in terms of accuracy or speed, you can try to further fine-tune the existing model using your own domain-specific or application-specific data to improve the recognition performance of the general semantic segmentation pipeline in your scenario.
4.1 Model Fine-Tuning
Since the general semantic segmentation pipeline includes a semantic segmentation module, if the pipeline's performance is not satisfactory, you can analyze the images with poor segmentation results and refer to the fine-tuning tutorial links in the table below to fine-tune the model.
| Scenario | Fine-Tuning Module | Reference Link |
|---|---|---|
| Prediction results are not satisfactory | Semantic Segmentation Module | Link |
4.2 Model Application
After fine-tuning with your private dataset, you will obtain a local model weight file.
If you need to use the fine-tuned model weights, simply modify the pipeline configuration file by replacing the path to the fine-tuned model weights with the corresponding location in the pipeline configuration file:
SubModules:
  SemanticSegmentation:
    module_name: semantic_segmentation
    model_name: PP-LiteSeg-T
    model_dir: null # Here replaced with the newly fine-tuned weight path.
    batch_size: 1
    target_size: None
Subsequently, refer to the command line method or Python script method in the local experience section to load the modified pipeline configuration file.
5. Multi-Hardware Support
PaddleX supports a variety of mainstream hardware devices, including NVIDIA GPU, Kunlunxin XPU, Ascend NPU, and Cambricon MLU. Simply modify the --device parameter to seamlessly switch between different hardware devices.
For example, if you use the Ascend NPU for semantic segmentation pipeline inference, the Python command is:
paddlex --pipeline semantic_segmentation \
        --input makassaridn-road_demo.png \
        --target_size -1 \
        --save_path ./output \
        --device npu:0
If you want to use the general semantic segmentation pipeline on a wider variety of hardware, please refer to the PaddleX Multi-Device Usage Guide.