表格单元格检测模块使用教程
一、概述
表格单元格检测模块是表格识别任务的关键组成部分,负责在表格图像中定位和标记每个单元格区域,该模块的性能直接影响到整个表格识别过程的准确性和效率。表格单元格检测模块通常会输出各个单元格区域的边界框(Bounding Boxes),这些边界框将作为输入传递给表格识别相关产线进行后续处理。
二、支持模型列表
推理耗时仅包含模型推理耗时,不包含前后处理耗时。
| 模型 | 模型下载链接 | mAP(%) | GPU推理耗时(ms) [常规模式 / 高性能模式] |
CPU推理耗时(ms) [常规模式 / 高性能模式] |
模型存储大小(MB) | 介绍 |
|---|---|---|---|---|---|---|
| RT-DETR-L_wired_table_cell_det | 推理模型/训练模型 | 82.7 | 33.47 / 27.02 | 402.55 / 256.56 | 124M | RT-DETR 是第一个实时的端到端目标检测模型。百度飞桨视觉团队基于 RT-DETR-L 作为基础模型,在自建表格单元格检测数据集上完成预训练,实现了对有线表格、无线表格均有较好性能的表格单元格检测。 |
| RT-DETR-L_wireless_table_cell_det | 推理模型/训练模型 |
测试环境说明:
- 性能测试环境
- 测试数据集:PaddleX 内部自建评测集。
- 硬件配置:
- GPU:NVIDIA Tesla T4
- CPU:Intel Xeon Gold 6271C @ 2.60GHz
- 软件环境:
- Ubuntu 20.04 / CUDA 11.8 / cuDNN 8.9 / TensorRT 8.6.1.6
- paddlepaddle 3.0.0 / paddlex 3.0.3
- 推理模式说明
| 模式 | GPU配置 | CPU配置 | 加速技术组合 |
|---|---|---|---|
| 常规模式 | FP32精度 / 无TRT加速 | FP32精度 / 8线程 | PaddleInference |
| 高性能模式 | 选择先验精度类型和加速策略的最优组合 | FP32精度 / 8线程 | 选择先验最优后端(Paddle/OpenVINO/TRT等) |
三、快速集成
❗ 在快速集成前,请先安装 PaddleX 的 wheel 包,详细请参考 PaddleX本地安装教程
完成 wheel 包的安装后,几行代码即可完成表格单元格检测模块的推理,可以任意切换该模块下的模型,您也可以将表格单元格检测的模块中的模型推理集成到您的项目中。运行以下代码前,请您下载示例图片到本地。
from paddlex import create_model
model = create_model(model_name="RT-DETR-L_wired_table_cell_det")
output = model.predict("table_recognition.jpg", threshold=0.3, batch_size=1)
for res in output:
    res.print(json_format=False)
    res.save_to_img("./output/")
    res.save_to_json("./output/res.json")
注:PaddleX 支持多个模型托管平台,官方模型默认优先从 HuggingFace 下载。PaddleX 也支持通过环境变量 PADDLE_PDX_MODEL_SOURCE 设置优先使用的托管平台,目前支持 huggingface、aistudio、bos、modelscope,如优先使用 bos:PADDLE_PDX_MODEL_SOURCE="bos";
👉 运行后,得到的结果为:(点击展开)
{"input_path": "table_recognition.jpg", "page_index": None, "boxes": [{"cls_id": 0, "label": "cell", "score": 0.9319108128547668, "coordinate": [109.83584594726562, 95.89978790283203, 212.70770263671875, 127.05546569824219]}, {"cls_id": 0, "label": "cell", "score": 0.9308021664619446, "coordinate": [109.75360870361328, 64.86648559570312, 212.84799194335938, 95.82242584228516]}, {"cls_id": 0, "label": "cell", "score": 0.9255117177963257, "coordinate": [110.005126953125, 30.894376754760742, 212.81178283691406, 64.80416107177734]}, {"cls_id": 0, "label": "cell", "score": 0.918117344379425, "coordinate": [212.87246704101562, 30.97587013244629, 403.8023986816406, 64.86235046386719]}, {"cls_id": 0, "label": "cell", "score": 0.9053983688354492, "coordinate": [212.89151000976562, 95.95629119873047, 403.36572265625, 127.11717224121094]}, {"cls_id": 0, "label": "cell", "score": 0.8567661046981812, "coordinate": [212.77899169921875, 64.98127746582031, 403.94781494140625, 95.87938690185547]}, {"cls_id": 0, "label": "cell", "score": 0.7800847887992859, "coordinate": [404.1282653808594, 64.99693298339844, 547.1578979492188, 95.95233917236328]}, {"cls_id": 0, "label": "cell", "score": 0.7557389736175537, "coordinate": [2.6574931144714355, 30.968334197998047, 109.94781494140625, 64.89448547363281]}, {"cls_id": 0, "label": "cell", "score": 0.6763500571250916, "coordinate": [2.534634590148926, 96.2182846069336, 109.79283905029297, 127.09756469726562]}, {"cls_id": 0, "label": "cell", "score": 0.6708637475967407, "coordinate": [404.02423095703125, 95.9552993774414, 547.2798461914062, 127.1763687133789]}, {"cls_id": 0, "label": "cell", "score": 0.6568276286125183, "coordinate": [2.2822303771972656, 65.10485076904297, 109.9916763305664, 95.96409606933594]}, {"cls_id": 0, "label": "cell", "score": 0.6159431338310242, "coordinate": [109.78962707519531, 95.94172668457031, 213.05418395996094, 127.06707763671875]}, {"cls_id": 0, "label": "cell", "score": 0.6098588109016418, "coordinate": [2.2127363681793213, 65.04467010498047, 110.0749282836914, 95.99105834960938]}, {"cls_id": 0, "label": "cell", "score": 0.6019916534423828, "coordinate": [403.98883056640625, 96.00384521484375, 547.2072143554688, 127.17021942138672]}, {"cls_id": 0, "label": "cell", "score": 0.5713056921958923, "coordinate": [404.4563903808594, 30.951345443725586, 547.1254272460938, 65.0811538696289]}, {"cls_id": 0, "label": "cell", "score": 0.5697788000106812, "coordinate": [212.81021118164062, 96.05030822753906, 403.7318115234375, 127.14639282226562]}, {"cls_id": 0, "label": "cell", "score": 0.4522075355052948, "coordinate": [4.883366584777832, 0.22239652276039124, 543.5488891601562, 31.06178855895996]}, {"cls_id": 0, "label": "cell", "score": 0.4165799021720886, "coordinate": [404.32574462890625, 30.99039649963379, 547.0177001953125, 65.01567840576172]}, {"cls_id": 0, "label": "cell", "score": 0.37421756982803345, "coordinate": [4.255210876464844, 0.18794140219688416, 543.521728515625, 30.862964630126953]}, {"cls_id": 0, "label": "cell", "score": 0.37030676007270813, "coordinate": [5.542935371398926, 0.2003617286682129, 541.3729858398438, 31.145313262939453]}, {"cls_id": 0, "label": "cell", "score": 0.34807300567626953, "coordinate": [2.534700393676758, 96.17605590820312, 109.90091705322266, 127.14675903320312]}, {"cls_id": 0, "label": "cell", "score": 0.3399328589439392, "coordinate": [3.5424537658691406, 0.17436155676841736, 543.90283203125, 31.138904571533203]}]}
[xmin, ymin, xmax, ymax]
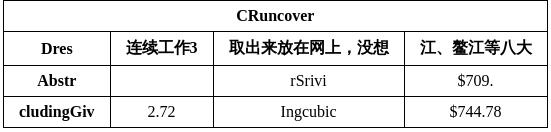
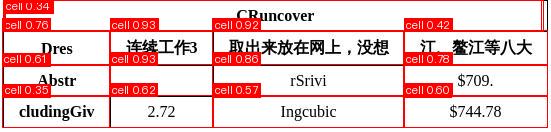
可视化图像如下:
相关方法、参数等说明如下:
create_model实例化表格单元格检测模型(此处以RT-DETR-L_wired_table_cell_det为例),具体说明如下:
| 参数 | 参数说明 | 参数类型 | 可选项 | 默认值 |
|---|---|---|---|---|
model_name |
模型名称 | str |
无 | 无 |
model_dir |
模型存储路径 | str |
无 | 无 |
device |
模型推理设备 | str |
支持指定GPU具体卡号,如“gpu:0”,其他硬件具体卡号,如“npu:0”,CPU如“cpu”。 | gpu:0 |
use_hpip |
是否启用高性能推理插件 | bool |
无 | False |
hpi_config |
高性能推理配置 | dict | None |
无 | None |
engine |
推理引擎 | str | None |
可选 paddle、paddle_static、paddle_dynamic、hpi、flexible、transformers。 |
None |
engine_config |
推理引擎配置 | dict | None |
不同引擎支持不同字段,请参考推理引擎与配置。 | None |
pp_option |
用于改变运行模式等配置项 | PaddlePredictorOption |
关于推理配置的详细说明,请参考兼容配置(PaddlePredictorOption)。 | None |
img_size |
输入图像大小;如果不指定,将默认使用PaddleX官方模型配置 | int/list |
|
无 |
threshold |
用于过滤掉低置信度预测结果的阈值;如果不指定,将默认使用PaddleX官方模型配置。在表格单元格检测任务中,适当降低阈值可能有助于获得更准确的结果 | float/dict |
|
无 |
-
其中,
model_name必须指定,指定model_name后,默认使用 PaddleX 内置的模型参数,在此基础上,指定model_dir时,使用用户自定义的模型。 -
调用表格单元格检测模型的
predict()方法进行推理预测,predict()方法参数有input、batch_size和threshold,具体说明如下:
| 参数 | 参数说明 | 参数类型 | 可选项 | 默认值 |
|---|---|---|---|---|
input |
待预测数据,支持多种输入类型 | Python Var/str/list |
|
无 |
batch_size |
批大小 | int |
任意整数 | 1 |
threshold |
用于过滤掉低置信度预测结果的阈值;如果不指定,将默认使用 creat_model 指定的 threshold 参数,如果 creat_model 也没有指定,则默认使用PaddleX官方模型配置 |
float/dict |
|
无 |
- 对预测结果进行处理,每个样本的预测结果均为对应的Result对象,且支持打印、保存为图片、保存为
json文件的操作:
| 方法 | 方法说明 | 参数 | 参数类型 | 参数说明 | 默认值 |
|---|---|---|---|---|---|
print() |
打印结果到终端 | format_json |
bool |
是否对输出内容进行使用 JSON 缩进格式化 |
True |
indent |
int |
指定缩进级别,以美化输出的 JSON 数据,使其更具可读性,仅当 format_json 为 True 时有效 |
4 | ||
ensure_ascii |
bool |
控制是否将非 ASCII 字符转义为 Unicode。设置为 True 时,所有非 ASCII 字符将被转义;False 则保留原始字符,仅当format_json为True时有效 |
False |
||
save_to_json() |
将结果保存为json格式的文件 | save_path |
str |
保存的文件路径,当为目录时,保存文件命名与输入文件类型命名一致 | 无 |
indent |
int |
指定缩进级别,以美化输出的 JSON 数据,使其更具可读性,仅当 format_json 为 True 时有效 |
4 | ||
ensure_ascii |
bool |
控制是否将非 ASCII 字符转义为 Unicode。设置为 True 时,所有非 ASCII 字符将被转义;False 则保留原始字符,仅当format_json为True时有效 |
False |
||
save_to_img() |
将结果保存为图像格式的文件 | save_path |
str |
保存的文件路径,当为目录时,保存文件命名与输入文件类型命名一致 | 无 |
- 此外,也支持通过属性获取带结果的可视化图像和预测结果,具体如下:
| 属性 | 属性说明 |
|---|---|
json |
获取预测的json格式的结果 |
img |
获取可视化图像 |
关于更多 PaddleX 的单模型推理的 API 的使用方法,可以参考PaddleX单模型Python脚本使用说明。
四、二次开发
如果你追求更高精度的现有模型,可以使用 PaddleX 的二次开发能力,开发更好的表格单元格检测模型。在使用 PaddleX 开发表格单元格检测模型之前,请务必安装 PaddleX的表格单元格检测相关模型训练插件,安装过程可以参考 PaddleX本地安装教程
4.1 数据准备
在进行模型训练前,需要准备相应任务模块的数据集。PaddleX 针对每一个模块提供了数据校验功能,只有通过数据校验的数据才可以进行模型训练。此外,PaddleX 为每一个模块都提供了 Demo 数据集,您可以基于官方提供的 Demo 数据完成后续的开发。若您希望用私有数据集进行后续的模型训练,可以参考PaddleX目标检测任务模块数据标注教程。
4.1.1 Demo 数据下载
您可以参考下面的命令将 Demo 数据集下载到指定文件夹:
wget https://paddle-model-ecology.bj.bcebos.com/paddlex/data/cells_det_coco_examples.tar -P ./dataset
tar -xf ./dataset/cells_det_coco_examples.tar -C ./dataset/
4.1.2 数据校验
一行命令即可完成数据校验:
python main.py -c paddlex/configs/modules/table_cells_detection/RT-DETR-L_wired_table_cell_det.yaml \
    -o Global.mode=check_dataset \
    -o Global.dataset_dir=./dataset/cells_det_coco_examples
Check dataset passed !信息。校验结果文件保存在./output/check_dataset_result.json,同时相关产出会保存在当前目录的./output/check_dataset目录下,产出目录中包括可视化的示例样本图片和样本分布直方图。
👉 校验结果详情(点击展开)
校验结果文件具体内容为:
"done_flag": true,
  "check_pass": true,
  "attributes": {
    "num_classes": 1,
    "train_samples": 230,
    "train_sample_paths": [
      "check_dataset\/demo_img\/img_45_2.png",
      "check_dataset\/demo_img\/img_69_1.png",
      "check_dataset\/demo_img\/img_99_1.png",
      "check_dataset\/demo_img\/img_6_1.png",
      "check_dataset\/demo_img\/img_47_3.png",
      "check_dataset\/demo_img\/img_54_2.png",
      "check_dataset\/demo_img\/img_25_1.png",
      "check_dataset\/demo_img\/img_73_1.png",
      "check_dataset\/demo_img\/img_51_2.png",
      "check_dataset\/demo_img\/img_93_3.png"
    ],
    "val_samples": 26,
    "val_sample_paths": [
      "check_dataset\/demo_img\/img_88_2.png",
      "check_dataset\/demo_img\/img_156_0.png",
      "check_dataset\/demo_img\/img_43_4.png",
      "check_dataset\/demo_img\/img_2_4.png",
      "check_dataset\/demo_img\/img_42_4.png",
      "check_dataset\/demo_img\/img_49_0.png",
      "check_dataset\/demo_img\/img_45_1.png",
      "check_dataset\/demo_img\/img_140_0.png",
      "check_dataset\/demo_img\/img_5_1.png",
      "check_dataset\/demo_img\/img_26_3.png"
    ]
  },
  "analysis": {
    "histogram": "check_dataset\/histogram.png"
  },
  "dataset_path": "cells_det_coco_examples",
  "show_type": "image",
  "dataset_type": "COCODetDataset"
上述校验结果中,check_pass 为 true 表示数据集格式符合要求,其他部分指标的说明如下:
attributes.num_classes:该数据集类别数为 1;attributes.train_samples:该数据集训练集样本数量为 230;attributes.val_samples:该数据集验证集样本数量为 26;attributes.train_sample_paths:该数据集训练集样本可视化图片相对路径列表;attributes.val_sample_paths:该数据集验证集样本可视化图片相对路径列表;
另外,数据集校验还对数据集中所有类别的样本数量分布情况进行了分析,并绘制了分布直方图(histogram.png):

4.1.3 数据集格式转换/数据集划分(可选)
在您完成数据校验之后,可以通过修改配置文件或是追加超参数的方式对数据集的格式进行转换,也可以对数据集的训练/验证比例进行重新划分。
👉 格式转换/数据集划分详情(点击展开)
(1)数据集格式转换
表格单元格检测支持 VOC、LabelMe 格式的数据集转换为 COCO 格式。
数据集校验相关的参数可以通过修改配置文件中 CheckDataset 下的字段进行设置,配置文件中部分参数的示例说明如下:
CheckDataset:convert:enable: 是否进行数据集格式转换,表格单元格检测支持VOC、LabelMe格式的数据集转换为COCO格式,默认为False;src_dataset_type: 如果进行数据集格式转换,则需设置源数据集格式,默认为null,可选值为VOC、LabelMe和VOCWithUnlabeled、LabelMeWithUnlabeled; 例如,您想转换LabelMe格式的数据集为COCO格式,以下面的LabelMe格式的数据集为例,则需要修改配置如下:
cd /path/to/paddlex
wget https://paddle-model-ecology.bj.bcebos.com/paddlex/data/det_labelme_examples.tar -P ./dataset
tar -xf ./dataset/det_labelme_examples.tar -C ./dataset/
......
CheckDataset:
  ......
  convert:
    enable: True
    src_dataset_type: LabelMe
  ......
随后执行命令:
python main.py -c paddlex/configs/modules/table_cells_detection/RT-DETR-L_wired_table_cell_det.yaml \
    -o Global.mode=check_dataset \
    -o Global.dataset_dir=./dataset/det_labelme_examples
当然,以上参数同样支持通过追加命令行参数的方式进行设置,以 LabelMe 格式的数据集为例:
python main.py -c paddlex/configs/modules/table_cells_detection/RT-DETR-L_wired_table_cell_det.yaml \
    -o Global.mode=check_dataset \
    -o Global.dataset_dir=./dataset/det_labelme_examples \
    -o CheckDataset.convert.enable=True \
    -o CheckDataset.convert.src_dataset_type=LabelMe
(2)数据集划分
数据集划分的参数可以通过修改配置文件中 CheckDataset 下的字段进行设置,配置文件中部分参数的示例说明如下:
CheckDataset:split:enable: 是否进行重新划分数据集,为True时进行数据集格式转换,默认为False;train_percent: 如果重新划分数据集,则需要设置训练集的百分比,类型为0-100之间的任意整数,需要保证和val_percent值加和为100;val_percent: 如果重新划分数据集,则需要设置验证集的百分比,类型为0-100之间的任意整数,需要保证和train_percent值加和为100; 例如,您想重新划分数据集为 训练集占比90%、验证集占比10%,则需将配置文件修改为:
......
CheckDataset:
  ......
  split:
    enable: True
    train_percent: 90
    val_percent: 10
  ......
随后执行命令:
python main.py -c paddlex/configs/modules/table_cells_detection/RT-DETR-L_wired_table_cell_det.yaml \
    -o Global.mode=check_dataset \
    -o Global.dataset_dir=./dataset/cells_det_coco_examples
数据划分执行之后,原有标注文件会被在原路径下重命名为 xxx.bak。
以上参数同样支持通过追加命令行参数的方式进行设置:
python main.py -c paddlex/configs/modules/table_cells_detection/RT-DETR-L_wired_table_cell_det.yaml \
    -o Global.mode=check_dataset \
    -o Global.dataset_dir=./dataset/cells_det_coco_examples \
    -o CheckDataset.split.enable=True \
    -o CheckDataset.split.train_percent=90 \
    -o CheckDataset.split.val_percent=10
4.2 模型训练
一条命令即可完成模型的训练,以此处表格单元格检测模型 RT-DETR-L_wired_table_cell_det 的训练为例:
python main.py -c paddlex/configs/modules/table_cells_detection/RT-DETR-L_wired_table_cell_det.yaml \
    -o Global.mode=train \
    -o Global.dataset_dir=./dataset/cells_det_coco_examples
- 指定模型的
.yaml配置文件路径(此处为RT-DETR-L_wired_table_cell_det.yaml),训练其他模型时,需要的指定相应的配置文件,模型和配置的文件的对应关系,可以查阅PaddleX模型列表(CPU/GPU)) - 指定模式为模型训练:
-o Global.mode=train - 指定训练数据集路径:
-o Global.dataset_dir - 其他相关参数均可通过修改
.yaml配置文件中的Global和Train下的字段来进行设置,也可以通过在命令行中追加参数来进行调整。如指定前 2 卡 gpu 训练:-o Global.device=gpu:0,1;设置训练轮次数为 10:-o Train.epochs_iters=10。更多可修改的参数及其详细解释,可以查阅模型对应任务模块的配置文件说明PaddleX通用模型配置文件参数说明。 - 新特性:Paddle 3.0 版本支持了 CINN 神经网络编译器,在使用 GPU 设备训练时,不同模型有不同程度的训练加速效果。在 PaddleX 中训练模型时,可通过指定参数
-o Train.dy2st=True开启。
👉 更多说明(点击展开)
- 模型训练过程中,PaddleX 会自动保存模型权重文件,默认为
output,如需指定保存路径,可通过配置文件中-o Global.output字段进行设置。 - PaddleX 对您屏蔽了动态图权重和静态图权重的概念。在模型训练的过程中,会同时产出动态图和静态图的权重,在模型推理时,默认选择静态图权重推理。
-
在完成模型训练后,所有产出保存在指定的输出目录(默认为
./output/)下,通常有以下产出: -
train_result.json:训练结果记录文件,记录了训练任务是否正常完成,以及产出的权重指标、相关文件路径等; train.log:训练日志文件,记录了训练过程中的模型指标变化、loss 变化等;config.yaml:训练配置文件,记录了本次训练的超参数的配置;.pdparams、.pdema、.pdopt.pdstate、.pdiparams、.json:模型权重相关文件,包括网络参数、优化器、EMA、静态图网络参数、静态图网络结构等;- 【注意】:Paddle 3.0.0 对于静态图网络结构信息的存储格式,由protobuf(原
.pdmodel后缀文件)升级为json(现.json后缀文件),以兼容PIR体系,并获得更好的灵活性与扩展性。
4.3 模型评估
在完成模型训练后,可以对指定的模型权重文件在验证集上进行评估,验证模型精度。使用 PaddleX 进行模型评估,一条命令即可完成模型的评估:
python main.py -c paddlex/configs/modules/table_cells_detection/RT-DETR-L_wired_table_cell_det.yaml \
    -o Global.mode=evaluate \
    -o Global.dataset_dir=./dataset/cells_det_coco_examples
- 指定模型的
.yaml配置文件路径(此处为RT-DETR-L_wired_table_cell_det.yaml) - 指定模式为模型评估:
-o Global.mode=evaluate - 指定验证数据集路径:
-o Global.dataset_dir其他相关参数均可通过修改.yaml配置文件中的Global和Evaluate下的字段来进行设置,详细请参考PaddleX通用模型配置文件参数说明。
👉 更多说明(点击展开)
在模型评估时,需要指定模型权重文件路径,每个配置文件中都内置了默认的权重保存路径,如需要改变,只需要通过追加命令行参数的形式进行设置即可,如-o Evaluate.weight_path=./output/best_model/best_model.pdparams。
在完成模型评估后,会产出evaluate_result.json,其记录了评估的结果,具体来说,记录了评估任务是否正常完成,以及模型的评估指标,包含 AP;
4.4 模型推理和模型集成
在完成模型的训练和评估后,即可使用训练好的模型权重进行推理预测或者进行Python集成。
4.4.1 模型推理
-
通过命令行的方式进行推理预测,只需如下一条命令。运行以下代码前,请您下载示例图片到本地。
与模型训练和评估类似,需要如下几步: -
指定模型的
.yaml配置文件路径(此处为RT-DETR-L_wired_table_cell_det.yaml) - 指定模式为模型推理预测:
-o Global.mode=predict - 指定模型权重路径:
-o Predict.model_dir="./output/best_model/inference" - 指定输入数据路径:
-o Predict.input="..."其他相关参数均可通过修改.yaml配置文件中的Global和Predict下的字段来进行设置,详细请参考PaddleX通用模型配置文件参数说明。
4.4.2 权重转换
本模块支持将 Paddle 动态图权重(.pdparams)转换为 safetensors 格式,方便在 PaddleX 的 paddle_dynamic 和 transformers 引擎中直接加载使用。支持权重转换的模型包括:RT-DETR-L_wired_table_cell_det、RT-DETR-L_wireless_table_cell_det。
- 通过命令行的方式进行权重转换,以
RT-DETR-L_wired_table_cell_det模型为例:
python main.py -c paddlex/configs/modules/table_cells_detection/RT-DETR-L_wired_table_cell_det.yaml \
    -o Global.mode=pdparams2safetensors \
    -o Pdparams2safetensors.input_path=./path/to/model.pdparams \
    -o Pdparams2safetensors.output_dir=./output/safetensors/
- 参数说明:
Global.mode:指定模式为权重转换:pdparams2safetensorsPdparams2safetensors.input_path:输入的.pdparams权重文件路径(也可指定包含该文件的目录)Pdparams2safetensors.output_dir:转换后的safetensors格式模型输出目录
转换完成后,输出目录中将包含 model.safetensors、config.json、preprocess_config.json、inference.yml 等文件,可直接用于推理。
其他相关参数均可通过修改 .yaml 配置文件中的 Pdparams2safetensors 下的字段来进行设置,详细请参考PaddleX通用模型配置文件参数说明。
4.4.3 模型集成
模型可以直接集成到 PaddleX 产线中,也可以直接集成到您自己的项目中。
1.产线集成
表格单元格检测模块可以集成的PaddleX产线有通用表格识别产线v2,只需要替换模型路径即可完成相关产线的表格单元格检测模块的模型更新。在产线集成中,你可以使用高性能部署和服务化部署来部署你得到的模型。
2.模块集成
您产出的权重可以直接集成到表格单元格检测模块中,可以参考快速集成的 Python 示例代码,只需要将模型替换为你训练的到的模型路径即可。