Visual Studio 2019 Community CMake Compilation Guide
PaddleOCR is tested on Windows based on Visual Studio 2019 Community. Microsoft has supported direct management of CMake cross-platform compilation projects since Visual Studio 2017, but it was not until 2019 that stable and complete support was provided, so if you want to use CMake to manage project compilation and build, we recommend that you use the Visual Studio 2019 environment to build.
All the examples below are demonstrated with the working directory as D:\projects\cpp.
1. Environment Preparation
1.1 Install the required environment
- Visual Studio 2019
- CUDA 10.2, cudnn 7+ (only required when using the GPU version of the prediction library)
- CMake 3.22+
Please make sure the system has the above basic software installed. We use the community version of VS2019.
1.2 Download PaddlePaddle C++ prediction library and Opencv
1.2.1 Download PaddlePaddle C++ prediction library
PaddlePaddle C++ prediction library provides different precompiled versions for different CPU and CUDA versions. Please download according to the actual situation: C++ prediction library download list
After decompression, the D:\projects\paddle_inference directory contains the following contents:
paddle_inference
├── paddle # paddle core library and header files
|
├── third_party # third-party dependent libraries and header files
|
└── version.txt # version and compilation information
1.2.2 Install and configure OpenCV
- Download Opencv for Windows platform from the OpenCV official website, Download address
- Run the downloaded executable file and unzip OpenCV to the specified directory, such as
D:\projects\cpp\opencv
1.2.3 Download PaddleOCR code
2. Start running
Step1: Build Visual Studio project
After cmake is installed, there will be a cmake-gui program in the system. Open cmake-gui, fill in the source code path in the first input box, and fill in the compilation output path in the second input box

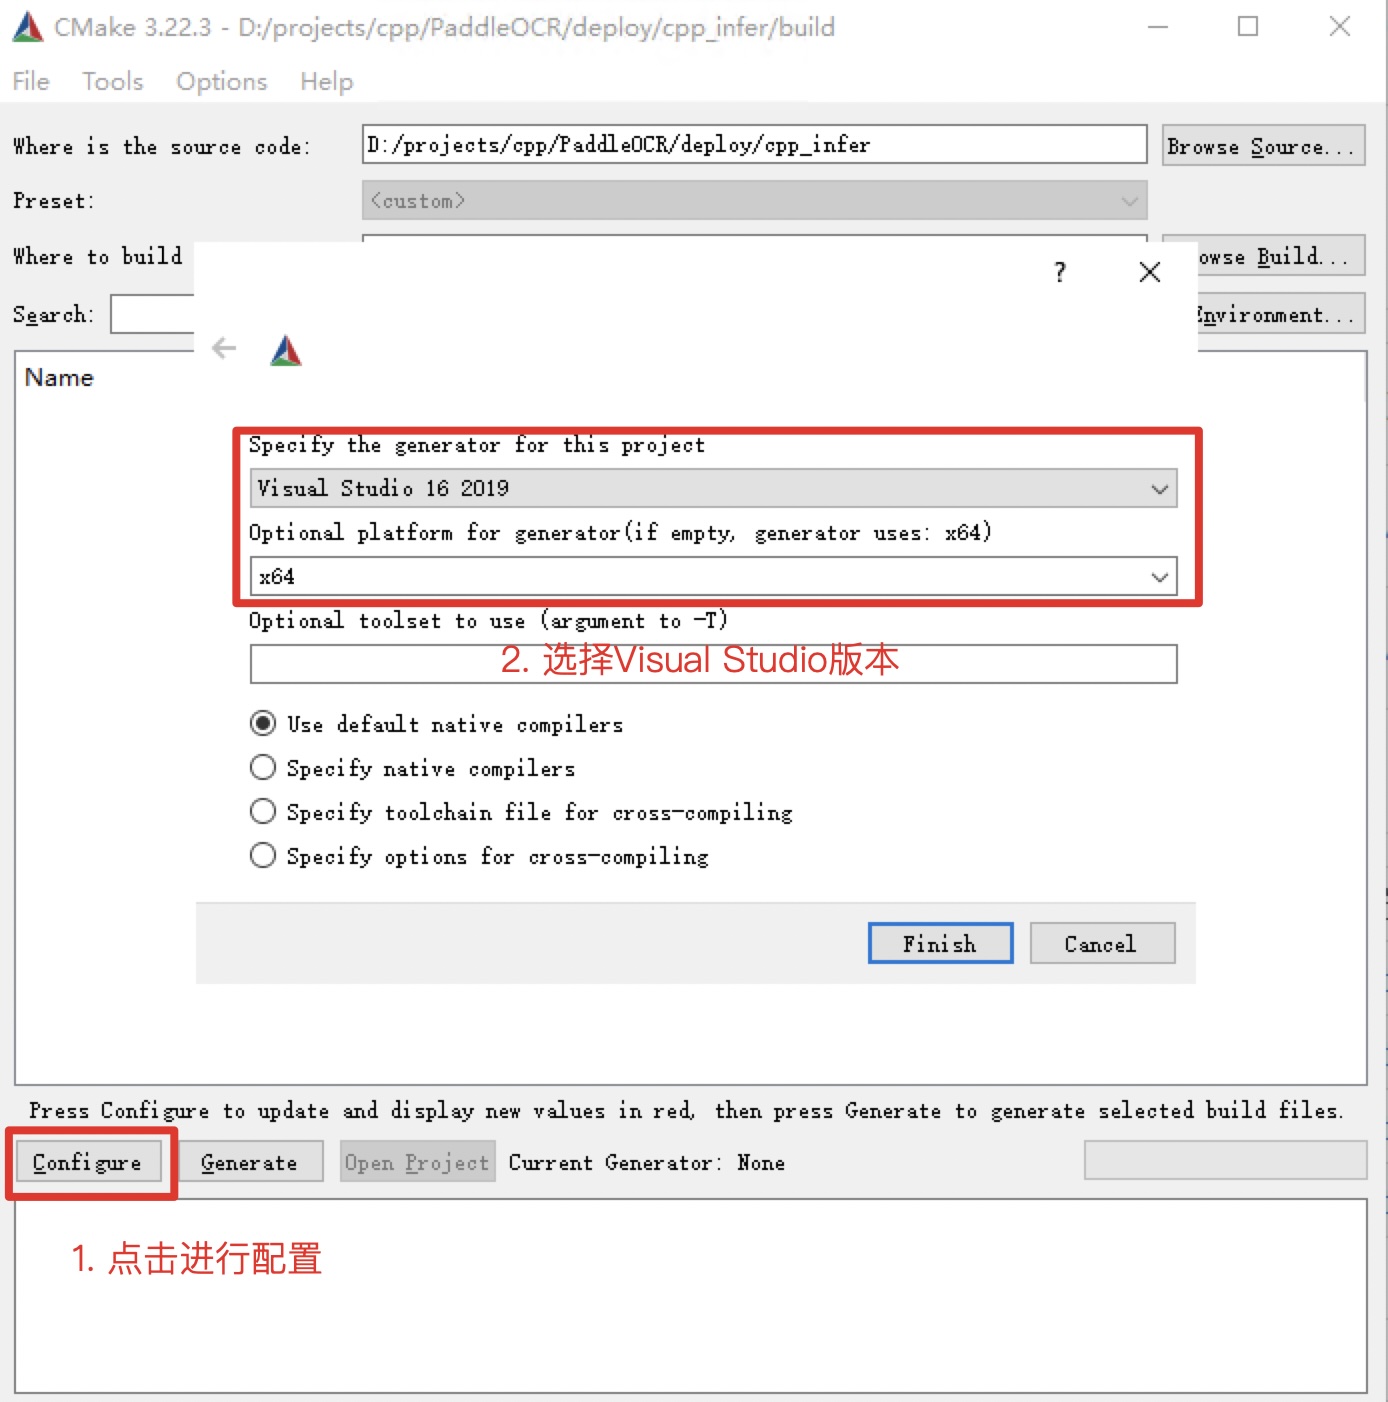
Step2: Execute cmake configuration
Click the Configure button at the bottom of the interface. The first click will pop up a prompt box for Visual Studio configuration, as shown below. Select your Visual Studio version is fine, and the target platform is x64. Then click the finish button to start the automatic configuration.
The first execution will report an error, which is normal. Next, configure Opencv and the prediction library
-
For cpu version, only the three parameters OPENCV_DIR, OpenCV_DIR, and PADDLE_LIB need to be considered
-
OPENCV_DIR: Fill in the location of the opencv lib folder
-
OpenCV_DIR: Fill in the location of the opencv lib folder
-
PADDLE_LIB: The location of the paddle_inference folder
-
For GPU version, on the basis of the cpu version, the following variables need to be filled in CUDA_LIB, CUDNN_LIB, TENSORRT_DIR, WITH_GPU, WITH_TENSORRT
-
CUDA_LIB: CUDA address, such as
C:\Program Files\NVIDIA GPU Computing Toolkit\CUDA\v11.2\lib\x64 -
CUDNN_LIB: The same as CUDA_LIB
-
TENSORRT_DIR: The location where TRT is unzipped after downloading, such as
D:\TensorRT-8.0.1.6 - WITH_GPU: Check
- WITH_TENSORRT: Check
The configured screenshot is as follows
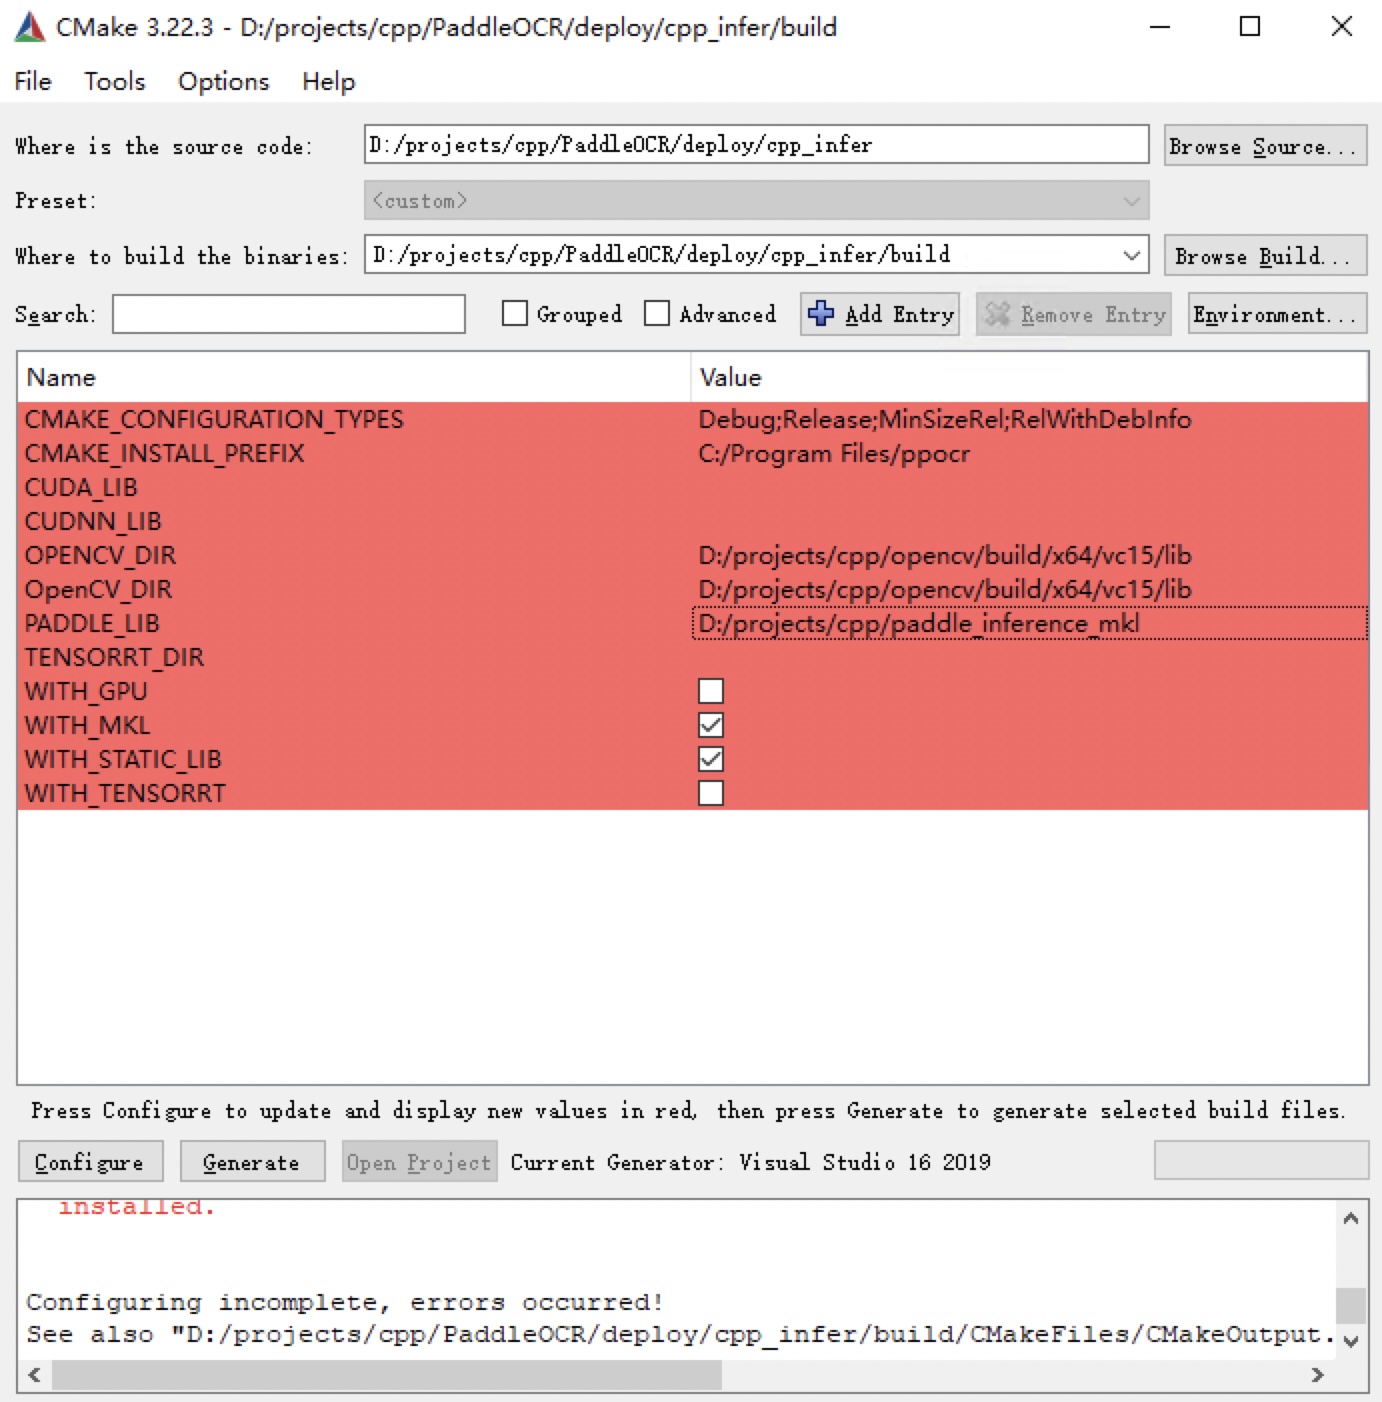
After the configuration is completed, click the Configure button again.
Note:
- If you are using the
openblasversion, please uncheckWITH_MKL - If you encounter the error
unable to access 'https://github.com/LDOUBLEV/AutoLog.git/': gnutls_handshake() failed: The TLS connection was non-properly terminated., change the github address indeploy/cpp_infer/external-cmake/auto-log.cmaketo https://gitee.com/Double_V/AutoLog address.
Step3: Generate Visual Studio Project
Click the Generate button to generate the sln file of the Visual Studio project.

Click the Open Project button to open the project in Visual Studio. The screenshot after opening is as follows
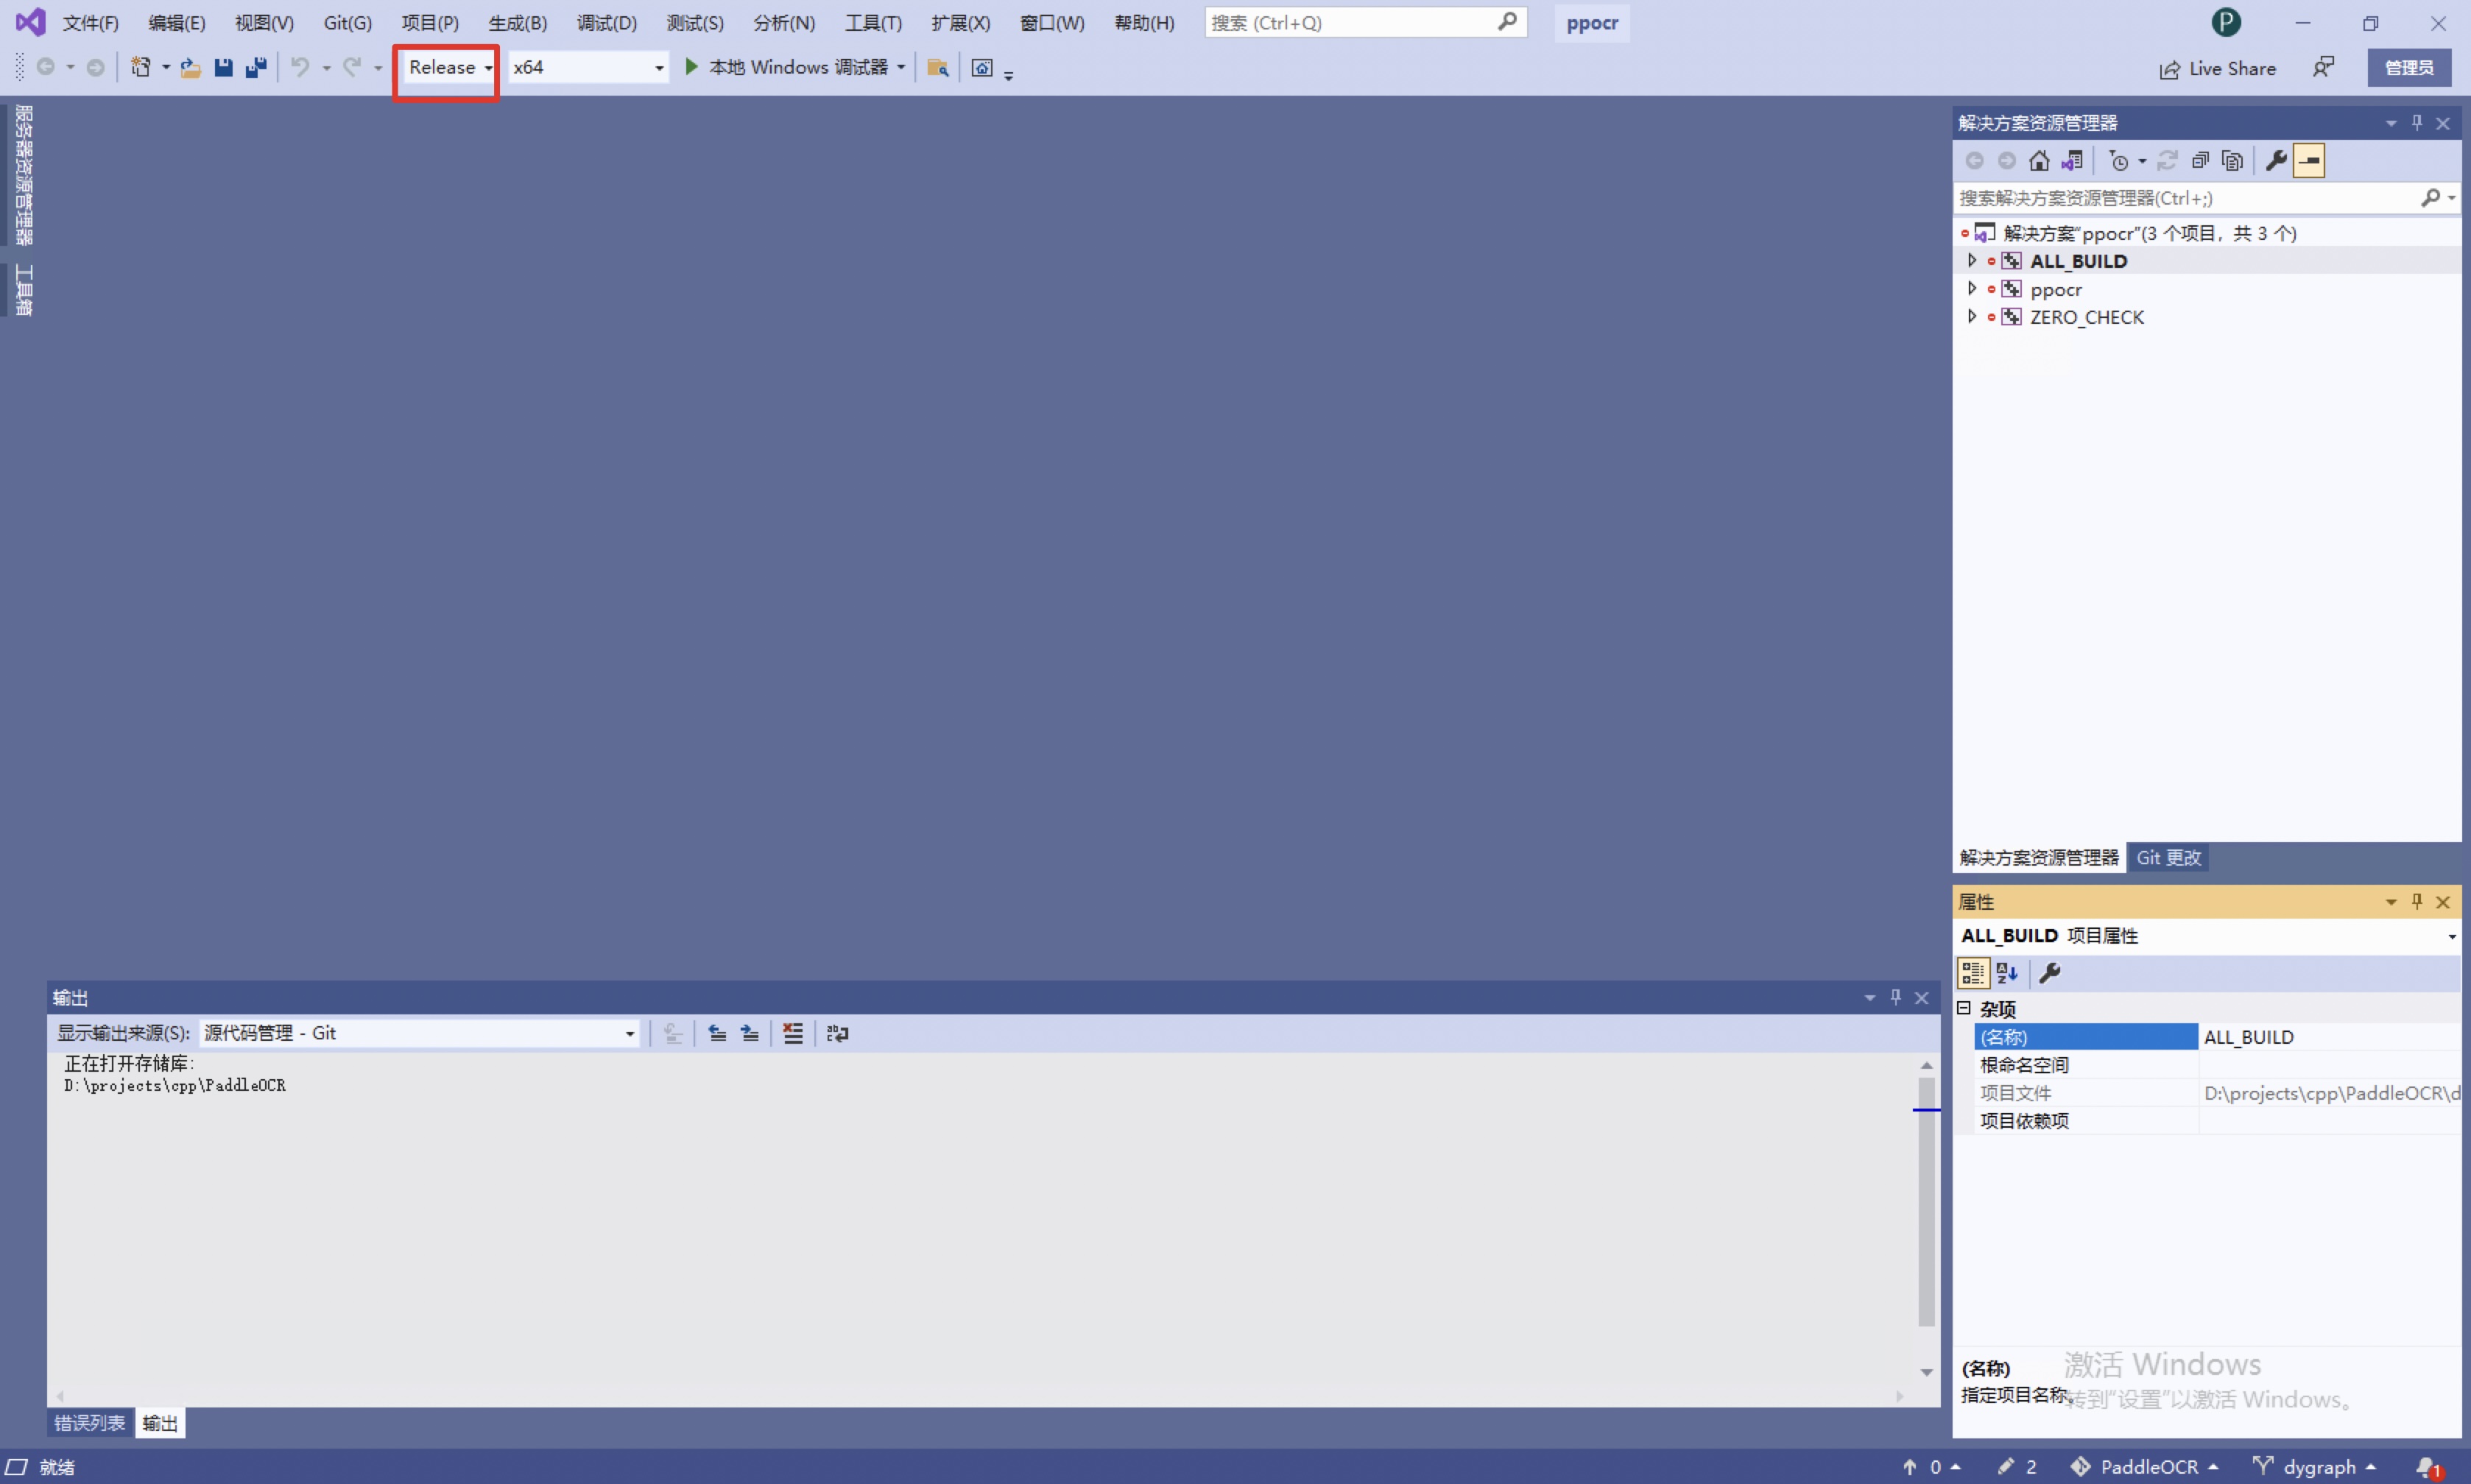
Before starting to generate the solution, perform the following steps:
-
Change
DebugtoRelease -
Download dirent.h and copy it to the include folder of Visual Studio, such as
C:\Program Files (x86)\Microsoft Visual Studio\2019\Community\VC\Auxiliary\VS\include.
Click Build->Generate Solution, and you can see the ppocr.exe file in the build/Release/ folder.
Before running, copy the following files to the build/Release/ folder
-
paddle_inference/paddle/lib/paddle_inference.dll -
paddle_inference/third_party/install/onnxruntime/lib/onnxruntime.dll -
paddle_inference/third_party/install/paddle2onnx/lib/paddle2onnx.dll -
opencv/build/x64/vc15/bin/opencv_world455.dll -
If you use the prediction library of the openblas version, you also need to copy
paddle_inference/third_party/install/openblas/lib/openblas.dll
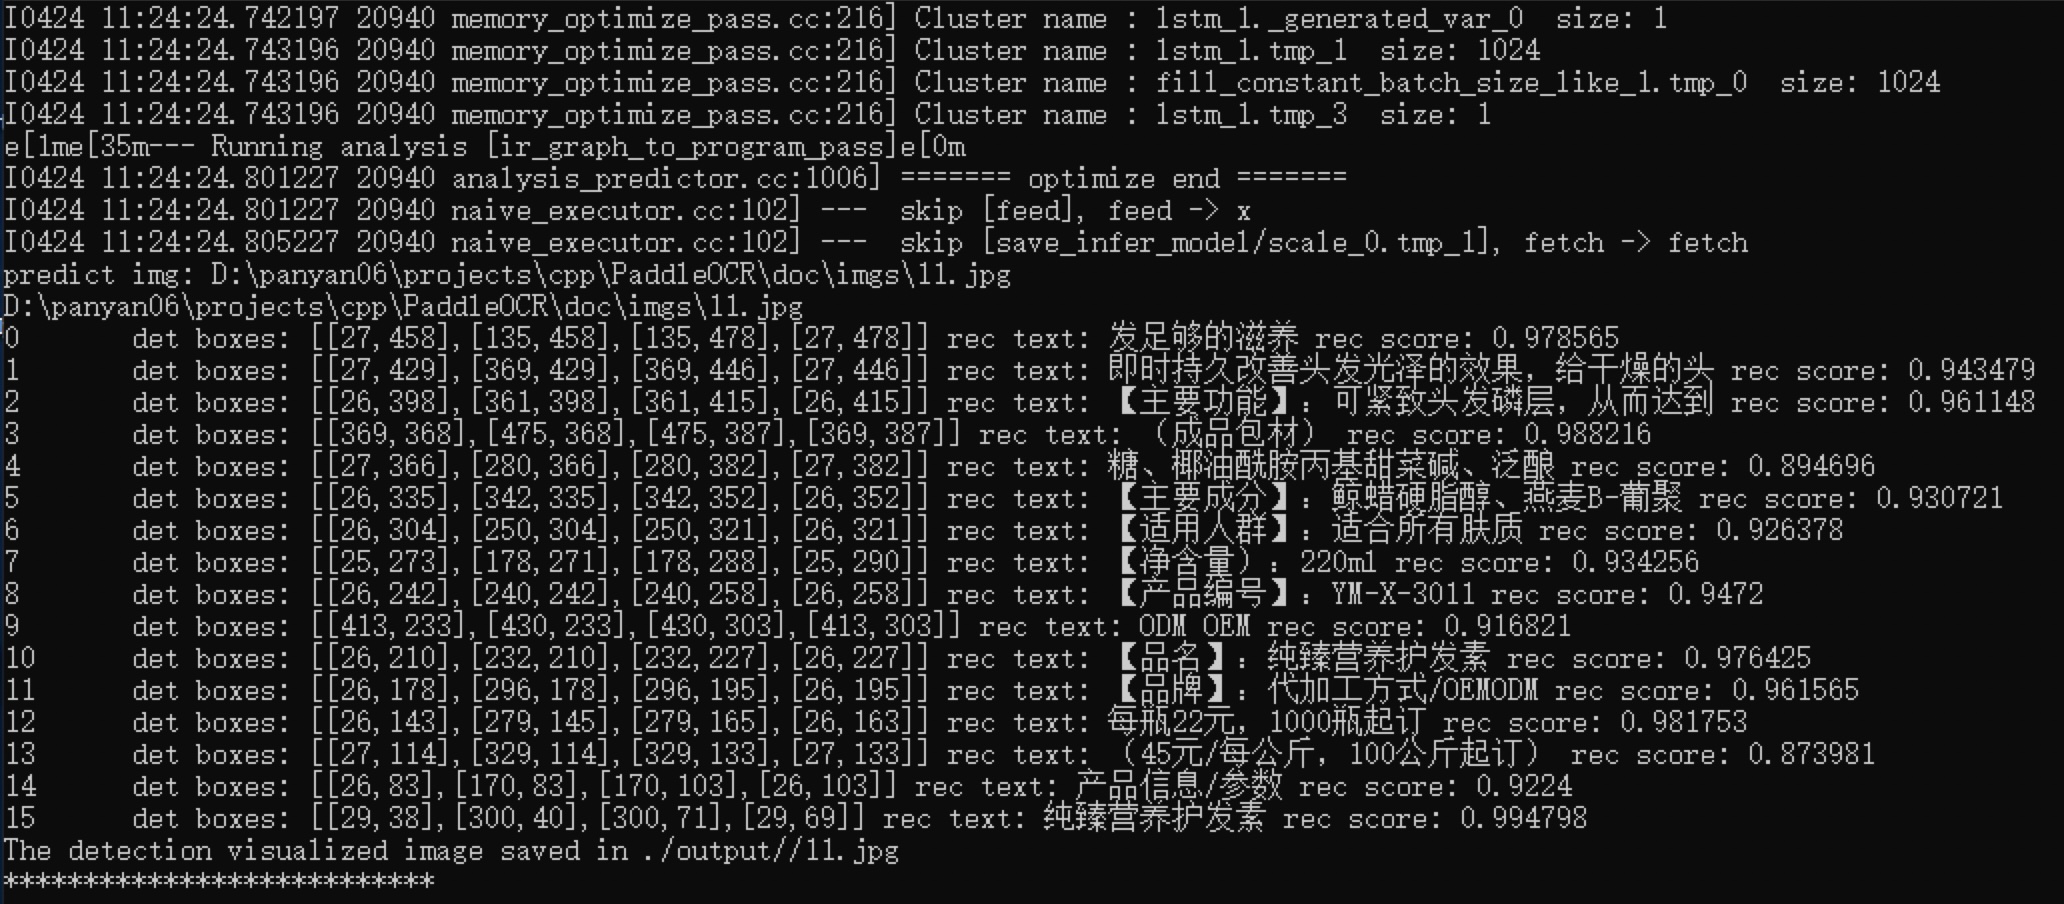
Step4: Prediction
The above `Visual Studio The executable file compiled by 2019 is in the directory of build/Release/. Open cmd and switch to D:\projects\cpp\PaddleOCR\deploy\cpp_infer:
cd /d D:\projects\cpp\PaddleOCR\deploy\cpp_infer
The executable file ppocr.exe is the sample prediction program. Its main usage is as follows. For more usage, please refer to the Instructions section of running demo.
The recognition result is as follows
FAQ
- When running, a pop-up window prompts
The application cannot be started normally (0xc0000142), and thecmdwindow promptsYou are using Paddle compiled with TensorRT, but TensorRT dynamic library is not found., copy all the dll files in the lib in the tensor directory to the release directory, and run it again.